


-

Chandrakant 'CK' Isi
19th Oct 2013
Pro Cam is Nokia's exclusive app that offers DLSR-like settings woven in a thoughtfully designed interface. Using this app, you can play around with shutter speed, white balance, ISO, exposure, and focus. Currently, it is only available on Lumia phones with PureView camera branding such as the Lumia 1020, Lumia 920, Lumia 925, and Lumia 928. So those with a mid-range or budget Lumia phones are basically out of luck. However, like most things in the world, there is a workaround for this. A helpful soul from WPCentral forums came up with a trick that lets you install Pro Cam on Lumia 820. After testing it on various WP8 devices, we confirm that this trick also works with 720 and 620. So here’s a step-by-step guide to get advanced camera controls on your Lumia:
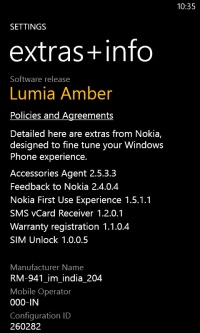
1. Make sure that your phone runs Windows Phone GD2 (Lumia Amber). To check the firmware version, go to Settings, and then click on Extras+info. If that doesn’t say Lumia Amber, hit 'Back', and click on 'Phone Update'. Last time I checked, the Amber update was live for Nokia Lumia 920, 820, and 620. Those who own 520 and 720 can flash their phone with the latest firmware. However, we advise you to wait, as it's just a matter of weeks before Nokia starts seeding the update.


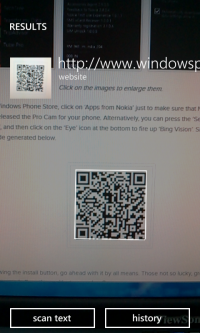
Click on the images to enlarge them.
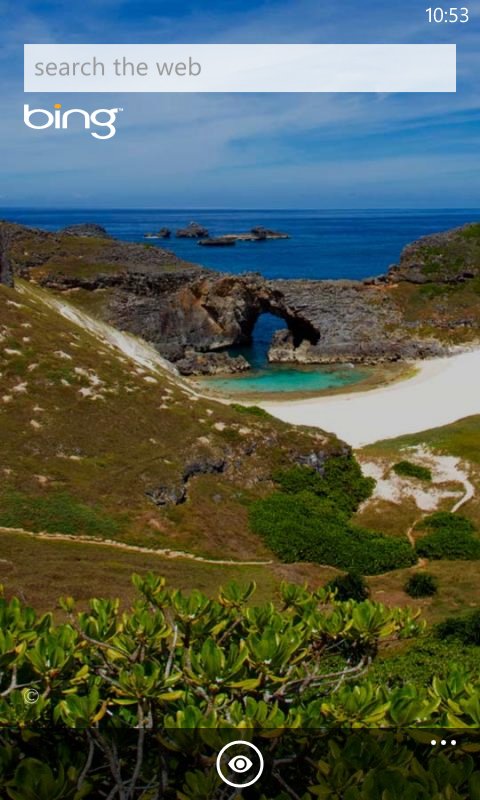
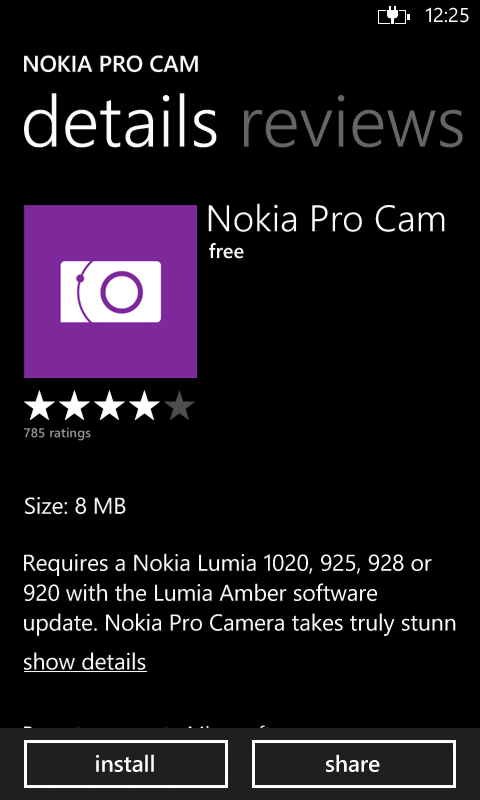
2. Go to Windows Phone Store, click on ‘Apps from Nokia’ just to make sure that Nokia hasn’t officially released the Pro Cam for your phone. Alternatively, you can press the ‘Search’ button to start ‘Bing’, and then click on the ‘Eye’ icon at the bottom to fire up ‘Bing Vision’. Simply point it at the barcode generated below.

If it's showing the install button, go ahead with it by all means. Those not so lucky, greeted with an error message shall continue with step number 3.

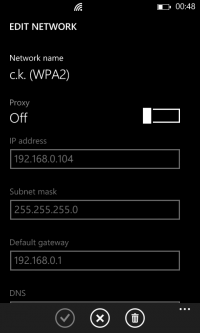
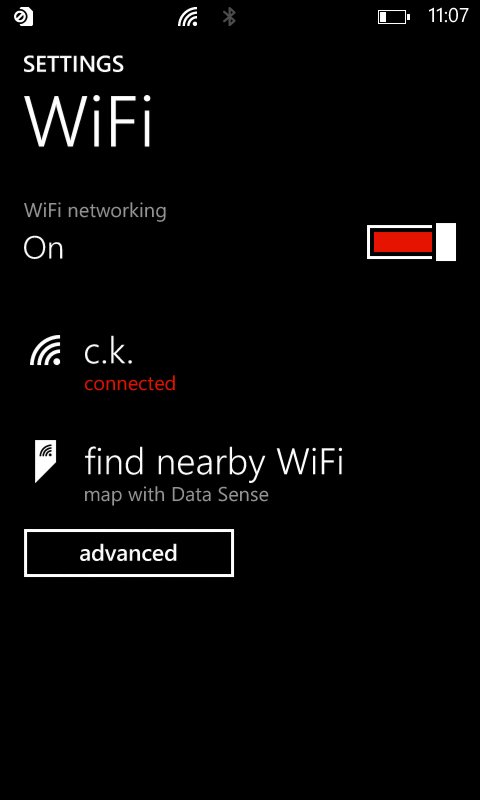
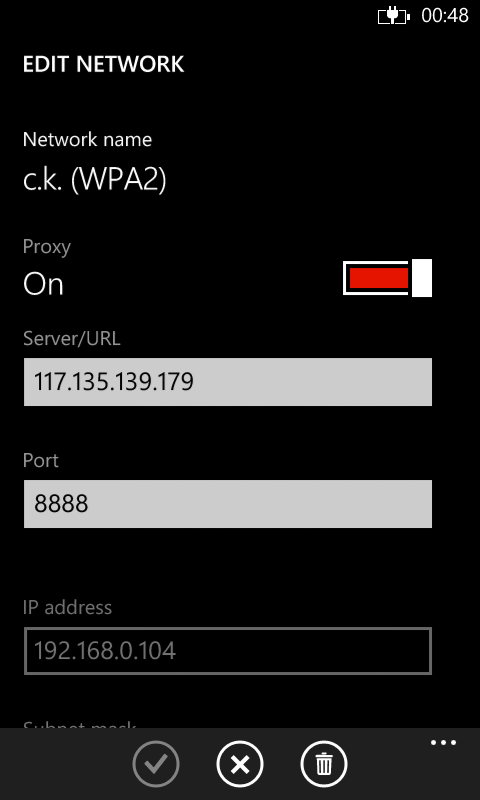
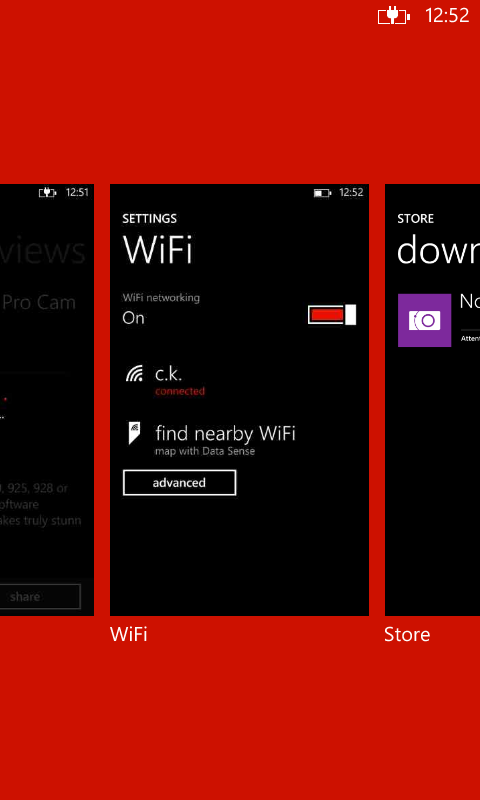
3. Connect to a Wi-Fi network, head over to ‘Settings’. Turn on ‘Proxy’, and enter"117.135.139.179"(Update: this proxy is no longer functional, but thanks to our reader Oliver, we've got an alternative) "103.13.29.118" in ‘Server’ and “8888” in ‘Port’. Don’t forget to click on the check mark.

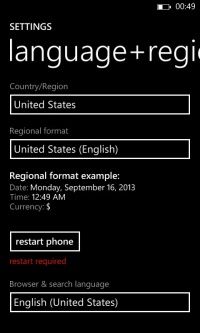
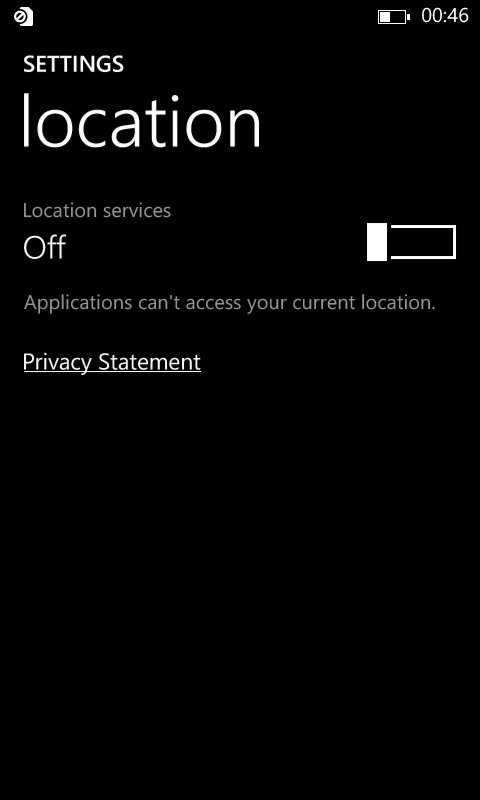
4. In ‘Date+time’ select any American state. For instance, we selected Arizona. Change the phone’s ‘Language+region’ settings to ‘United States’, and hit 'Restart'. After booting the phone, turn Off the 'Location' service, just to be on the safe side.


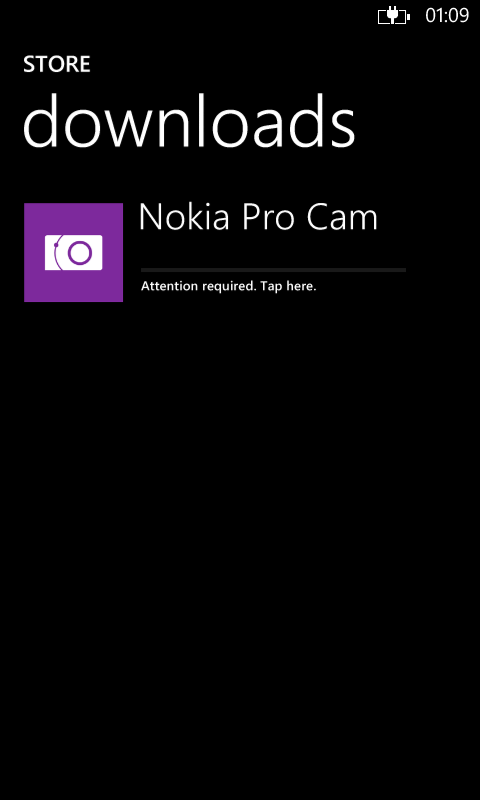
5. Go to Store, and look for Pro Cam again, as shown in Step 2. Now you'll get the ‘Install’ option, but the download process will interrupt within a second. Now, keep this window open. Press Home, go to ‘Settings’, click on the active Wi-Fi connection, and turn off the ‘Proxy’.


6. Press and hold the ‘Back’ button to see the list of recently opened apps. Select the window representing the interrupted download process, and hit ‘Retry’. Depending upon your connection speed, the Pro Cam app will take a minute or two to download and install.


7. Now that the Pro Cam has been installed, revert the Language+region and Date+time settings to normal. While all the Pro Cam features work fine, just don't expect the final output to be as good as what you get on the 920, 925 and 1020. Finally, happy snapping.

How To Install Nokia Pro Cam On Non-PureView Lumia Phones | TechTree.com
How To Install Nokia Pro Cam On Non-PureView Lumia Phones
Now you don't have to spend an arm or leg to get DSLR-like camera options on your WP8 Amber smartphones.


.png)

News Corner
- DRIFE Begins Operations in Namma Bengaluru
- Sevenaire launches ‘NEPTUNE’ – 24W Portable Speaker with RGB LED Lights
- Inbase launches ‘Urban Q1 Pro’ TWS Earbuds with Smart Touch control in India
- Airtel announces Rs 6000 cashback on purchase of smartphones from leading brands
- 78% of Indians are saving to spend during the festive season and 72% will splurge on gadgets & electronics
- 5 Tips For Buying A TV This Festive Season
- Facebook launches its largest creator education program in India
- 5 educational tech toys for young and aspiring engineers
- Mid-range smartphones emerge as customer favourites this festive season, reveals Amazon survey
- COLORFUL Launches Onebot M24A1 AIO PC for Professionals
TECHTREE