


-

Kamakshi S
27th Aug 2013
These days, it has become a trend to add effects to clicks. While smartphone users turn to apps, which are quite easy to use, people with point and shoots or DSLRs will find it cumbersome to transfer pictures to a smartphone just to add effects (yes, people do that too!). So here are some easy quick effects that you can use, that too with a free, feature-rich software.
Selective Colouring Effect
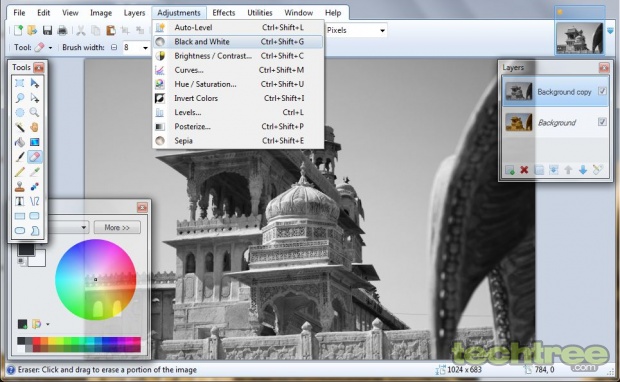
Several cameras today allow users to take selective colour shots from the device. In such pictures, most part of the image is in grey scale, but some parts of it show colour. If your camera cannot do that yet, you can still get the effect while post-processing. That being said, your picture should be shot in its original colour and not in black-and-white (unless you are shooting in the camera RAW mode). Once you have picked an image to work around with, here's how you can go about with adding the effect to your pictures.Load your image into Paint.NET, and create a duplicate layer (Layer > Duplicate Layer). Now select this new layer and click Adjustments > Black and White to convert the image into grey scale.
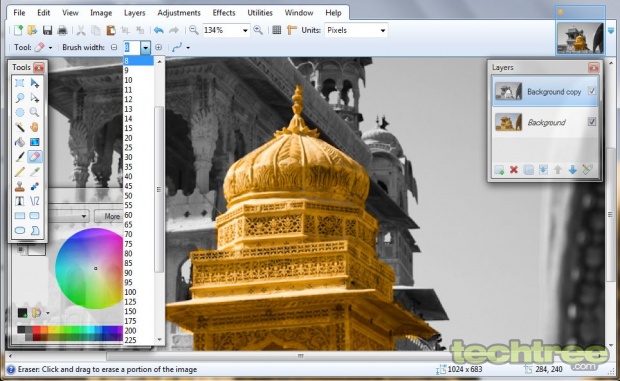
Next hit E on your keyboard to select the eraser tool. Set the Brush Width to a size of your choice depending on the image you choose. For instance you can set it as high as 20 to erase out a larger portion of the image, and set it to as low as 2 for better precision.
Now if you want to give your picture a surreal feel, you can play around with its brightness and contrast levels. For that, select the Background layer (one with the coloured image). Go to Adjustments > Brightness/Contrast and alter the values using the sliders. Once you are satisfied with the result click OK.
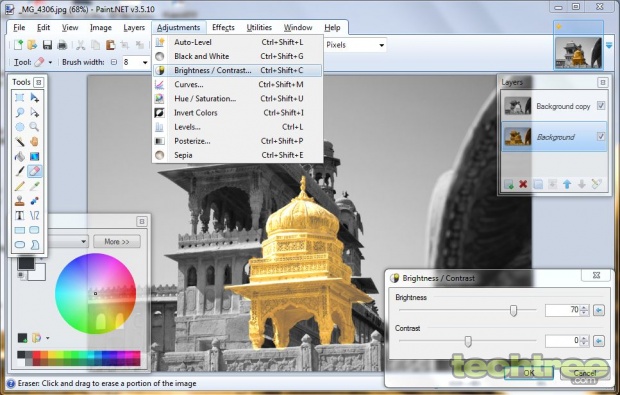
But if you prefer the image to be untouched, you can leave the brightness value untouched. Save the file and your image is ready.

Old-School Lomo Effect
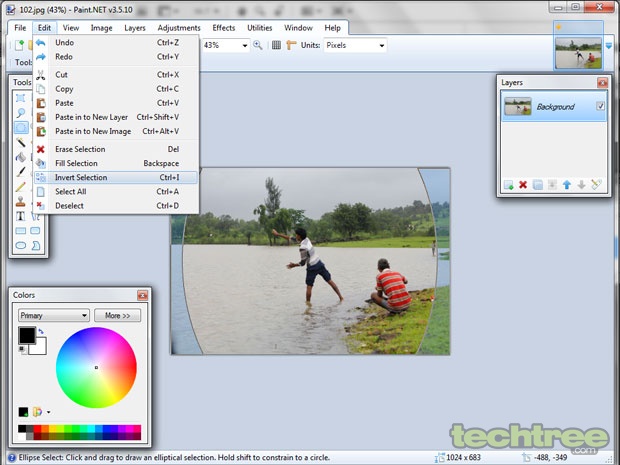
Not all of us have steady hands, or sometimes settings get messed up. But you don’t need to delete pictures just because of that; these are the best kind of shots to experiment with, using a software. Over or under exposed images, or those with excessive noise/grain are perfect for such experimental effects. For those not in the know, Lomography dates back to 19th century analog cameras with film that couldn’t handle colours as well as digital cameras of today.Now to get this effect using Paint.net, load the image in the software and select the ellipse tool. Zoom out of the image enough, because we are only adding vignette to the image. Now once you are happy with the selection, go to Edit > Invert Selection.
Add a new layer (Layers > Add New Layer), select the layer and fill the selection with black. Next hit control+D to deselect. Go to Effects > Blur > Gaussian Blur. Set the blur radius as required and hit OK.

Now, vignette only affects the picture's corners. For a cleaner effect, go to Layers > Layer Property and set the opacity as required. Once set, select the background layer.

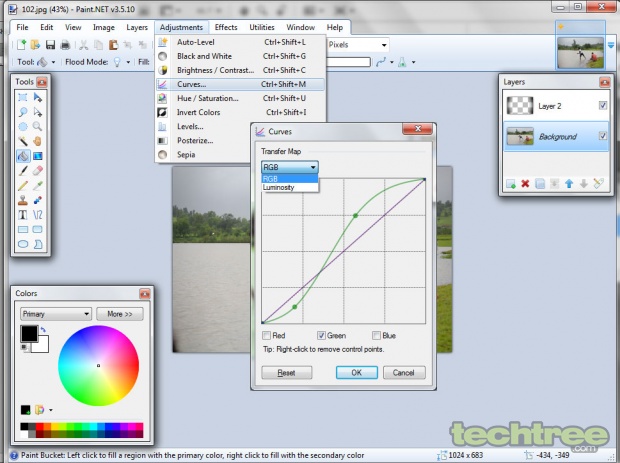
Next we need to skew the colour balance to give it the uneven hues. Go to Adjustments > Curves. Set the Transfer Map value to RGB. Since my picture has more of greens, I've kept the Green channel on. Change the curves to get the final effect.
Finally, you need to add noise to the image to give it the raw touch. Unless your shot already has that part covered, here's what you need. Go to Effects > Noise > Add Noise. Set the noise value and saturation levels as desired.

Save the file and your lomo picture is ready to flaunt!

Spooky Effect With Sepia Tones
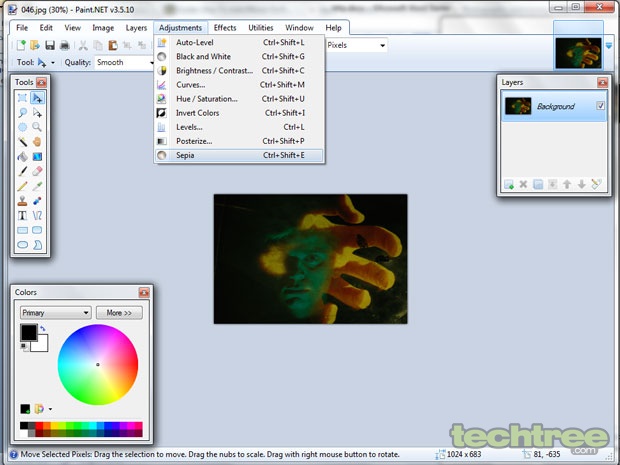
Similar to the monochrome effect, sepia is a monotone hue, which is based on the brown colour tone. It typically is associated with aging pictures. This effect is pretty straight forward to apply in Paint.net, there is a built-in filter that you can apply. Here's how you do it:Load the image in the application; zoom out of the picture as much as possible. Go to Adjustments > Sepia to add the effect.
Next, click the More button on the Colors box (Window > Color). Select the Primary option in the drop down box, set the colour as black, and set the Transparency Alpha Value at around 75. Similarly, select Secondary and set the colour as white. Again, select the Transparency Alpha Value as zero.

Now select the Gradient tool, and select the Radial option. Select a point on your image and drag it outside the image, to get the desire result.

Save your image once you are happy with the effect. Your sepia shot is ready.

We will take a break here. Experiment with these effects for now. We will share more tricks with you shortly. If there is any specific effect that you would like to know about, do let us know in the comments section below.
Guide: How To Add Effects To Your Photos Using Paint.NET | TechTree.com
Guide: How To Add Effects To Your Photos Using Paint.NET
A quick way to play around with colours in your captures.
News Corner
- DRIFE Begins Operations in Namma Bengaluru
- Sevenaire launches ‘NEPTUNE’ – 24W Portable Speaker with RGB LED Lights
- Inbase launches ‘Urban Q1 Pro’ TWS Earbuds with Smart Touch control in India
- Airtel announces Rs 6000 cashback on purchase of smartphones from leading brands
- 78% of Indians are saving to spend during the festive season and 72% will splurge on gadgets & electronics
- 5 Tips For Buying A TV This Festive Season
- Facebook launches its largest creator education program in India
- 5 educational tech toys for young and aspiring engineers
- Mid-range smartphones emerge as customer favourites this festive season, reveals Amazon survey
- COLORFUL Launches Onebot M24A1 AIO PC for Professionals
TECHTREE