


-

Kamakshi S
27th May 2013
While several cameras today come with the toy effect built in, it isn't really one of the major USPs for which you'd purchase a camera. In fact if you are a DSLR user, the tilt shift lens which is used to create such miniature effect wouldn't really be high on your must-have lens list (especially when it costs in excess of Rs 1 lakh!). After all you'll be able to capture the same type of images every time, which doesn't work with all kinds of framing anyway. So instead, you can fake the effect using free tools on your PC. While the effect is a lot easier on advanced paid tools such as Photoshop, free tools such as Paint.NET and GIMP don't disappoint you either. So if you have been itching to give your wide-angle aerial shots a makeover, here's how you can go about it:
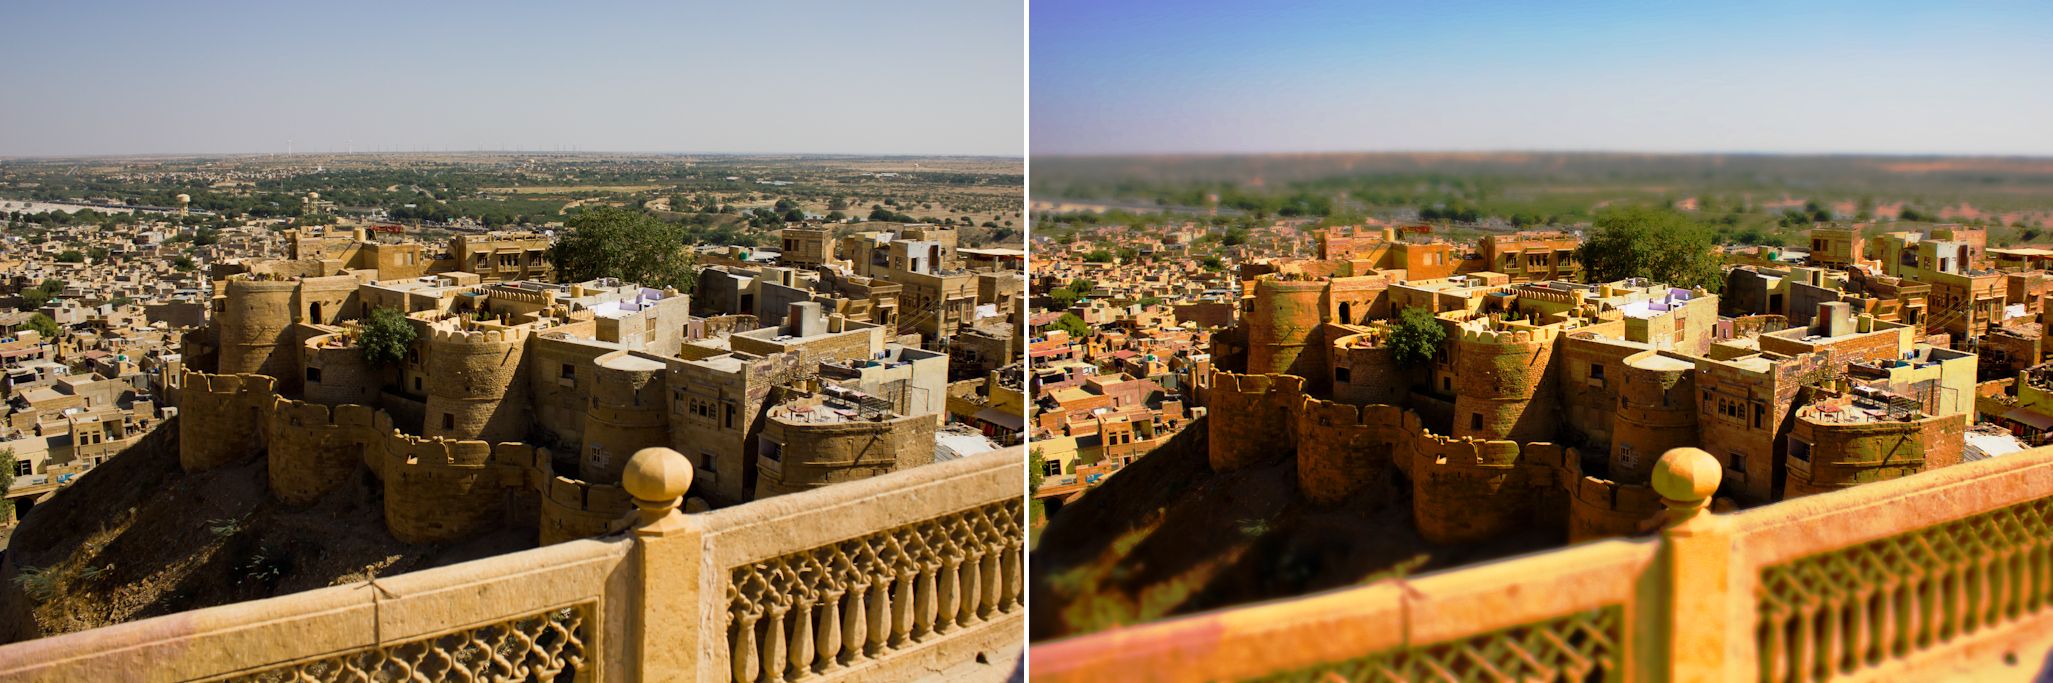
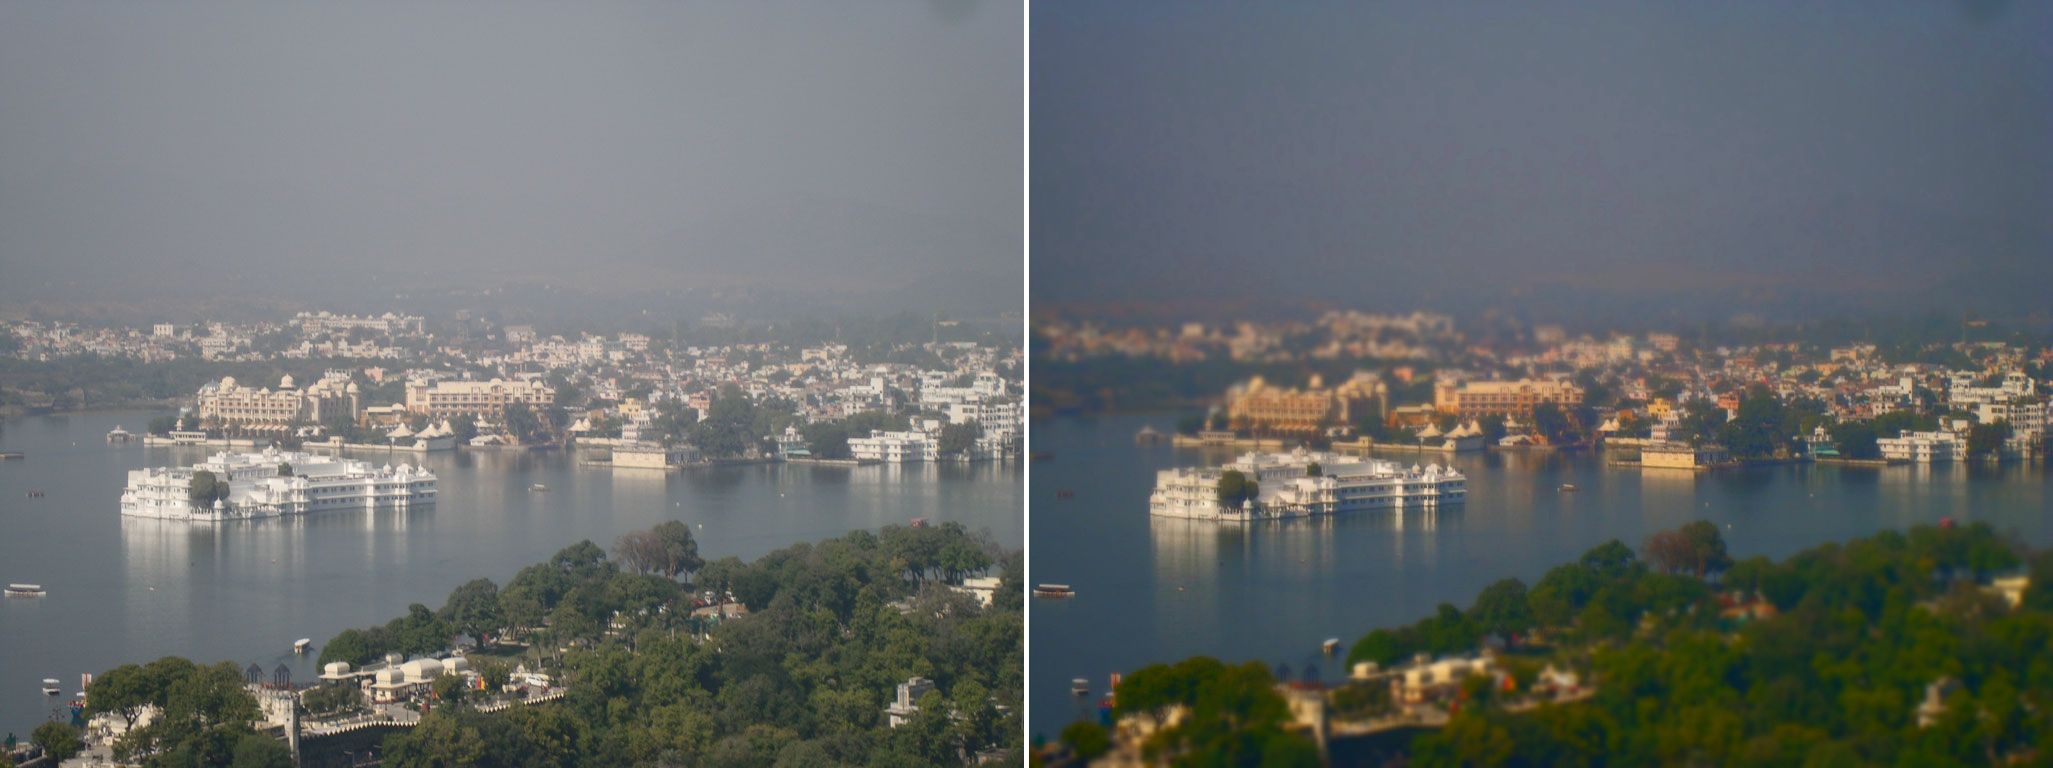
Picking The Right Image
The miniature effect doesn’t work well with all kinds of images, so the most difficult part is to pick a photograph that fits this theme. Well, the image you pick needs to fulfil two criteria: one, it needs to be a wide-angle shot and two, the scene needs to be shot from a bit of elevation. Once you have managed to finalise an image, the next step is to pick an application to work with.
Working With GIMP
GIMP is often referred to as a free Photoshop alternative. But this freeware isn't something new users are comfortable with. Often you will need to look at free plug-ins and brushes to edit images the Photoshop way, but these are available, nonetheless. However some plug-ins such as the Focus Blur tool can be tiring to install. That being said, we can work around the effect without it as well. Here's how:First up, you'll need to install GIMP on your system. You can download the software here, and proceed from there. Once it's up and running, open image in the software. Click Image > Duplicate to create a duplicate layer of the image. Then select this duplicate layer select Filters > Blur > Gaussian Blur. Set the blur value between 10 and 15. Click OK when you are happy with the results.

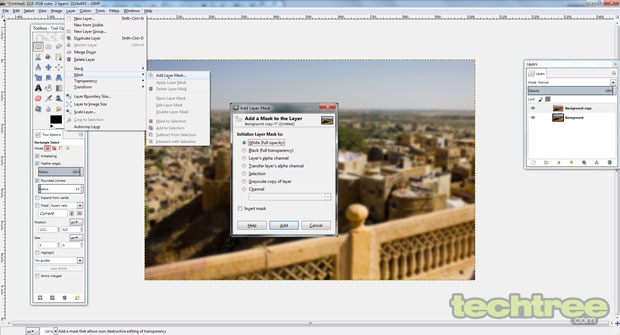
Next, go to Layer > Mask > Add Layer Mask. Select White (full opacity) option and click Add.
Hit R on your keyboard to select the Rectangle Select Tool and mark the area that you want to highlight (unblur). Set the Feather edges value to 100. Finally, go to Colors > Invert and the effect is almost done. Once satisfied, go to Layer > Merge Down.
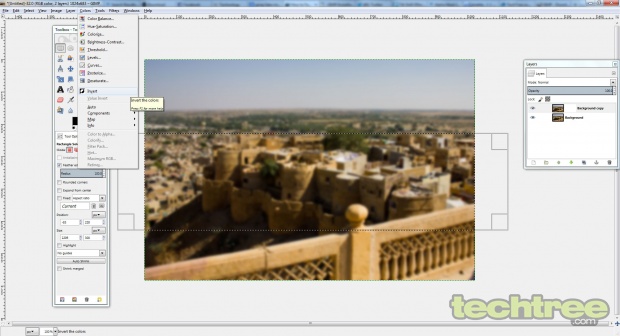
Now you need to make it appear like a toy, for which you'd have to play around with its colours. For that, go to Colors > Hue-Saturation, set the value between 50 and 75. You can further fix the image's colour with the Curves tool.

Save the image (or Export it) as a JPEG file. Your miniature shot with a fake tilt-and-shift effect is ready.
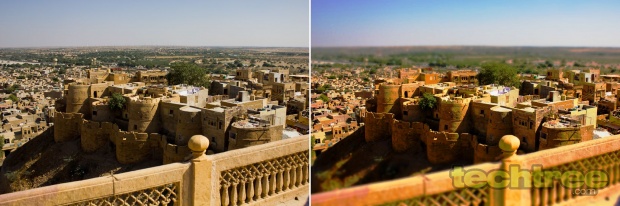
Click to enlarge the imagePlaying With Paint.NET
Now if GIMP is not your weapon of choice and you want something simpler to work with, then Paint.NET is a easier tool to manage. Apart from the software, which you can download here, you'll have to get the Alpha Mask Import Plugin. Just download and unzip the plug-in in the applications Effects folder inside Program Files. Then restart the software and we can begin.Load the picture in application, and go to Layers > Duplicate Layer. To create a blur effect on this copied layer, go to Effects > Blurs > Gaussian Blur, set the blur value between 5 and 8, and click OK.

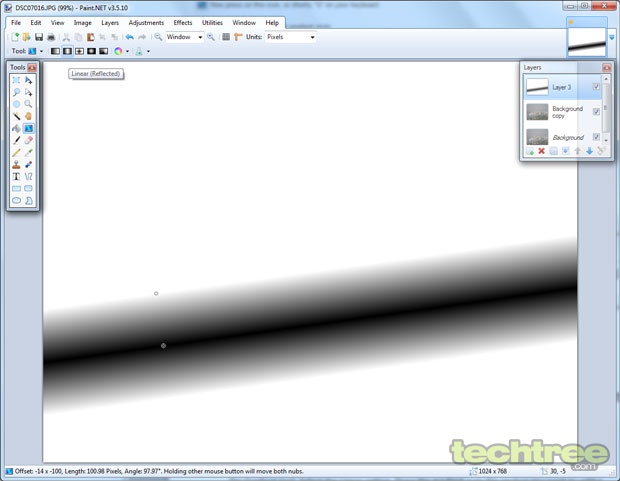
Now create yet another empty layer (Layers > Add New Layer), and hit G on your keyboard to start the Gradient tool. Select the Linear option. Draw the gradient over the section you want to unblur, and select the Rectangle Select tool from the Tool bar. Hit Ctrl+A, and Ctrl+C to copy the layer. Now uncheck the layer's visibility.
Once done, select the original image layer, and go to Effects > Alpha Mask. Ensure that the Invert Mask and Paste from Clipboard options have been checked on. Click OK, and move the original layer above the copy using the arrow keys in the Layers dialog box.

Delete the Gradient layer and merge the others using Layers > Merge Down. We're almost done with the image. Finally set the colours using the Adjustments > Hue/ Saturation, and the Adjustments > Curves options.

Save the image and you are good to go.

Click to enlarge the image
Guide: Adding Miniature Effects To Your Photographs | TechTree.com
Guide: Adding Miniature Effects To Your Photographs
A quick tutorial to help you turn your wide-angle shots into scale models.
News Corner
- DRIFE Begins Operations in Namma Bengaluru
- Sevenaire launches ‘NEPTUNE’ – 24W Portable Speaker with RGB LED Lights
- Inbase launches ‘Urban Q1 Pro’ TWS Earbuds with Smart Touch control in India
- Airtel announces Rs 6000 cashback on purchase of smartphones from leading brands
- 78% of Indians are saving to spend during the festive season and 72% will splurge on gadgets & electronics
- 5 Tips For Buying A TV This Festive Season
- Facebook launches its largest creator education program in India
- 5 educational tech toys for young and aspiring engineers
- Mid-range smartphones emerge as customer favourites this festive season, reveals Amazon survey
- COLORFUL Launches Onebot M24A1 AIO PC for Professionals
TECHTREE